Skip to main content
Search
Search This Blog
Refugee Crafter
Posts
Showing posts from July, 2008
Show all
July 30, 2008
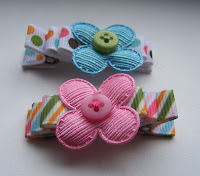
Crocheted Hair Clips
July 29, 2008
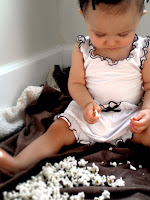
Popcorn Bloomer and Blouse GIVEAWAY !!!!!!!
July 28, 2008
Because I Was Taught to Share
July 28, 2008
Digital Scrapbooking
July 26, 2008
Hair Clip Giveaway!
July 26, 2008
Clip Giveaway
July 25, 2008
Darling Skirt Giveaway
July 19, 2008
First Dress
July 17, 2008
Another Darling Dress!
July 15, 2008
Darling Dresses
July 12, 2008
July Layout
Newer Posts
Older Posts
Home