July Layout
 So here's what I have so far for July's layout. I like it well enough to make it live, but I'm not sure it's quite what I want. If you have any ideas on how to spice it up, let me know.
I'm rather pleased with the title box. I've always loved striped socks. (If any of you get my name for Christmas, a pair of tall striped stockings would be great :)
There are two parts of my fashion personality vying for my retail attention. First there's the Audrey Hepburn side that wants to be refined and classy. And then...there's the artsy side that wants to be bohemian, colorful, quasi-emo, and fun all at the same time. It's the artsy side that makes me walk past the striped tights at the mall twice. It's my all-too-empty pocket book that keeps me walking. In hindsight, I guess this picture kind of merges those two parts together.
I used the following pictures to create my title:

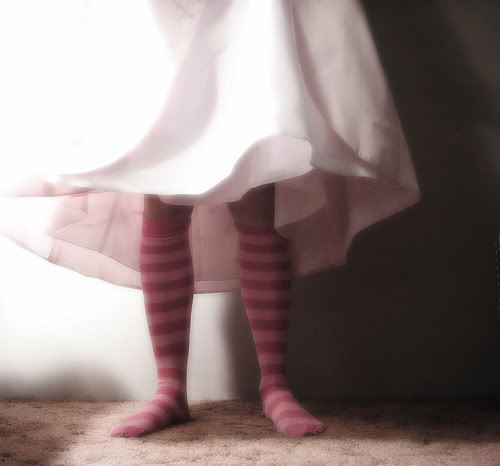
(The gray striped socks are from chocosho.com. I found them using google's image search.)
For those of you out there interested in Photoshop, here's how I did it. First, I increased the saturation on the skirt to make it a striking red, and then combined the pictures, beginning by cutting out the gray striped legs and pasting them on a white background. The quick selection tool in Photoshop CS3 was a huge help in selecting the legs especially after I realized I could refine the edges using the menu at the top. (You could use the magnetic lasso tool also.) I then saved the legs selection using the option under the select menu. This now-saved selection comes into play later.
Next, I used the magnetic lasso with a feather of 1 or 2 px to select the skirt and paste it on a layer above the gray legs and resized it to fit. Then, I re-loaded my saved legs selection using the select menu so that the legs were again outlined. With the skirt layer still highlighted, I erased the parts of the skirt that overlapped the legs. Using the loaded selection kept me from erasing too much.
Here's where it got a little more involved. First, I selected the inverse using shift-apple-I (or control-shift-I on a PC) so that everything but the legs was selected. Then, I cloned parts of the skirt to make up for the places where the skirt and legs didn't match up. Having the inverse selected kept me from accidentally cloning over what I had just erased.
It still looked pasted together so I added a new layer and painted red using a soft brush and a low opacity over the tights where I thought the red of the skirt would have reflected onto them in real life. I also painted a little red on parts of the skirt where it was too white. I cleaned up the edges with the eraser and changed the layer mode to "multiply" to let the lower layers shine through. I also decreased the opacity of the red painted layer.
Then I flattened the image and used the clone tool to clean up the edges where the legs still had a white halo.


Comments